Do you need to know how to screenshot on Mac and crop like a pro? If so, you’ve come to the right place! In this blog post, we’ll cover all the basics of taking screenshots on Mac, plus a few tips and tricks for cropping them like a pro. Whether you’re a beginner or an experienced user, this guide will help you get the perfect screenshot every time. Read on to find out more about how to learn screenshots on Mac and crop like a pro.
How to screenshot on macbook air
Taking screenshots on a Macbook Air is easy and can be done with a few simple steps.
1. Open the window or screen you want to capture.
2. Press the “Command” + “Shift” + “3” keys on your keyboard all at once.
3. You will hear a sound indicating that your screenshot has been captured.
4. You can find your screenshot in the Pictures folder of your Macbook Air, or you can search for it using the Spotlight feature.
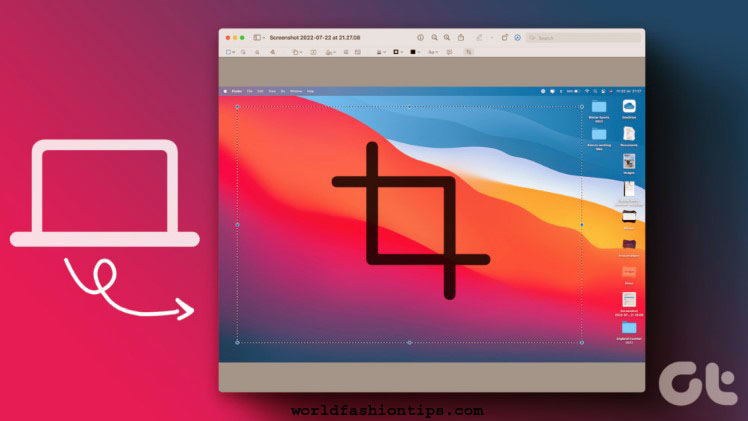
If you want to crop your screenshot, you can use the Preview app included with Mac OS X.
1. Open the screenshot in the Preview app.
2. Click on the “Select” button in the toolbar, then drag and select the area you want to crop from the screenshot.
3. When you have finished selecting the area, click on “Crop” from the toolbar.
4. Your cropped image will appear in the Preview app window and can be saved by clicking “File” and then “Save As” from the menu bar. By following these simple steps, you can easily take screenshots on your Macbook Air and crop them like a pro.
How to screenshot on macbook and crop
Taking screenshots and cropping them on a Macbook is relatively easy. With just a few clicks, you can quickly and easily capture and crop whatever you need. Here’s how to do it:
1. To take a screenshot of your entire screen, press Command+Shift+3 on your keyboard.
2. To take a screenshot of only a portion of the screen, press Command+Shift+4, and drag to select the area you want to capture.
3. To open the screenshot you just took, double click it in the bottom right corner of your screen.
4. To crop the screenshot you just took, open Preview and select “Tools” and then “Crop” from the menu bar.
5. Select the area you would like to keep in the cropped image by dragging and clicking.
6. To save the cropped image, go to File>Export As and select a file type, location, and name for your cropped image.
Now that you know how to screenshot on a Macbook and crop it, you can easily and quickly capture and crop whatever you need!
mac crop screenshot shortcut Taking a screenshot on a Mac is an easy process, but cropping it to the right size and shape can be time-consuming. Fortunately, Macs have a built-in shortcut for quickly cropping screenshots. To use this shortcut, simply press the Command-Shift-4 keys simultaneously, then click and drag a box around the portion of the screen you would like to capture. When you let go of the mouse button, the screenshot will be cropped down to your selection.
The resulting screenshot will appear in your desktop as a .png file with the name “Screenshot” followed by the date and time. If you want to save the screenshot to another folder or rename it, simply select the image and press Command-C to copy it, then open the desired destination folder and press Command-V to paste the image there. Using this shortcut makes cropping screenshots a breeze and will save you time when you need to capture specific portions of your Mac’s screen.
Why can’t i crop a screenshot on mac
It is a common problem for many Mac users who are trying to take and crop a screenshot. It may seem like an easy task, but if you don’t know how to do it properly, it can be quite a challenge. The main reason why you cannot crop a screenshot on Mac is that the default keyboard shortcut for taking screenshots does not include the ability to crop it. In order to be able to crop your screenshot, you need to first take it using the right keyboard shortcut.
The default shortcut for taking screenshots on Mac is ‘Command + Shift + 3’. This shortcut will take a screenshot of your entire screen and save it as an image file on your desktop. However, this command does not offer you any cropping options. To be able to crop your screenshot, you will need to use the ‘Command + Shift + 4’ shortcut. This shortcut gives you the option of drawing a box around the area of the screen you would like to capture. Once you have drawn the box, simply release the mouse and the area within the box will be saved as an image file on your desktop.
Once you have taken the screenshot, you can then open it up in Preview and use the cropping tools available to crop it to your desired size and shape. It is important to note that if you are cropping an image taken with the ‘Command + Shift + 3’ shortcut, the entire image will still remain visible even when cropped. Therefore, if you wish to keep only a certain portion of the screenshot, you must take it with the ‘Command + Shift + 4’ shortcut and then crop it in Preview.
How to crop a screenshot on windows 10
Cropping screenshots on Windows 10 is easy and straightforward. The steps below will help you get started:
1. Take a screenshot on your computer: Press the Windows logo + PrtScn keys to take a screenshot on Windows 10
2. Find the screenshot: Your screenshots will be saved in the Pictures > Screenshots folder by default. You can also use the Photos app to find your screenshots.
3. Open the screenshot in Paint: Open the screenshot in Paint by right-clicking the image and selecting Open with > Paint.
4. Crop the image: You can select an area on the screenshot to crop by using the Select tool or you can use the Crop tool to quickly crop an area of the screenshot.
5. Save the cropped image: Once you’re happy with the area you’ve cropped, click on File > Save As and save the image as a new file.
That’s it! You’ve now successfully cropped a screenshot on Windows 10. Cropping screenshots is a great way to remove unwanted elements from a screenshot or to focus on a specific part of an image. With Paint, cropping images is very simple and easy.
Conclusion:
Taking screenshots and cropping them on your Mac can be a great way to capture an image of something you find online or in a document. Whether you need to share an image, save it for later, or just look at it again, capturing and cropping screenshots on your Mac is an easy process. With the shortcuts available, you can take a screenshot in no time. While cropping a screenshot on a Mac can be tricky if you don’t know where to look, once you learn how to crop screenshots, it becomes second nature. So get out there and start taking screenshots.